

Microsoft Dynamics GP Copy/Paste Functionality
Let’s say you purchased a Microsoft Dynamics GP enterprise resource planning system (ERP), or you are thinking about buying it. You hear over and over again that it saves time, which saves money — right?
The Copy and Paste functionality, while seemingly small, is actually one of the most beneficial capabilities within Microsoft Dynamics GP.
Almost everyone uses Microsoft Excel in their day-to-day business data recording. Since Excel is a Microsoft product, a simple copy and paste action on the part of the user will easily and accurately populate the desired data into Microsoft Dynamics GP to correct a general ledger (GL) distribution on an already posted transaction, or even to record month end journal entries (JE).
Here is how you do it:
We will be working within the Financial Series and using the General Ledger module.
- Prepare the paste location
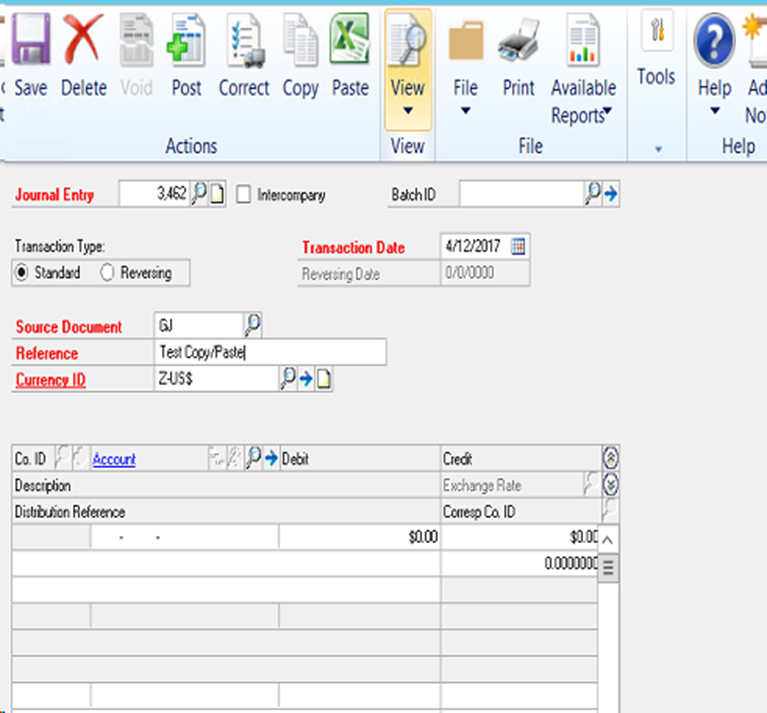
- Open up a new General Entry window (Financial> Transactions> General)
- Ensure that all required fields are filled in.
- Journal Entry number will be assigned automatically by Dynamics GP
- Transaction Date defaults to the same as the system, but can be changed
- Source Document coding will be assigned automatically by Dynamics GP
- Reference is the description of the entry. Example: “Month End Adjustments,” “Account Re-class,” etc.
- Currency ID – This is a system default code that identifies the currency being used
- Prepare the journal entry in an Excel spreadsheet
*Note: Do not use a zero value in a cell. GP will recognize it as a value. Leave blank.
| Distribution Reference | GL account # | Debit | Credit |
| Re-class | 100-6170-00 | 453.25 | |
| Re-class | 100-6500-00 | 523.66 | |
| Re-class | 200-6170-00 | 453.25 | |
| Re-class | 200-6500-00 | 523.66 |
- The columns must be in a particular order that Dynamics GP will recognize:
- Reference Description
- GL Account Number
- Debit Amount
- Credit Amount
- Copy the data
- Just as you would in any other program, highlight the section needed, either use the edit drop down box and select copy, hit the ctrl “C” keys on your keyboard, or right click your mouse.
- You do not need to copy the headings, just the lines of data that you need.
- Paste the data into Dynamics GP
- Go to your prepared Transaction Entry window
- Click on the green Excel-themed Paste button in the Actions tool bar at the top of the window.

Voila! The data you copied from Excel now appears in the Transaction Entry. The last thing to do: SAVE or POST.
Options on How to Post to the General Ledger
You can either post right away to the General Ledger from the Transaction Entry window by clicking on the Post button, located in the Actions tool bar. You can also assign it to a batch before it is posted to the General Ledger.
Here’s how to assign the entry to a batch:
- Place your mouse in the Batch ID field on the transaction entry window. Type in the name of the batch you want to use.
- Hit the Tab key on your keyboard or move to a different field and you will be prompted by Dynamics GP to add the Batch ID.
- You may also elect to use an existing Batch by clicking on the Magnifying glass and selecting an existing batch ID.
Now that the data you entered into the Transaction Entry window has been assigned to a Batch ID, you will need to post the batch to the General Ledger. To do that, follow these steps:
- Go to Financial>Transactions>Batches
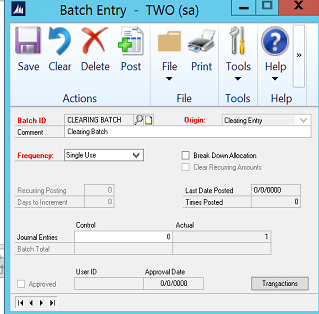
- Click on Batches and the Batch Entry window will appear.
- Inside the Batch Entry window click on the magnifying glass. A list will appear showing pending batches. To select the one you want to post, highlight the batch name with your mouse, click on the Select button or double click on the Batch ID.
- This returns you to the Batch Entry
- You can review the entry by clicking on the printer button in the ribbon bar.
- In the Report Destination window you have the option of viewing your entry by printing to a screen view, printer, or file.
- If you see something wrong, return to the Batch Entry window and click on the Transactions button in the lower right-hand corner.
- Look for your Transaction Entry.
- Make the corrections and SAVE before returning to the Batch Entry
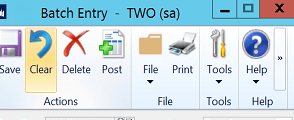
- Click the Post button, which will post the batch transactions to the General Ledger.
If you need assistance with Microsoft Dynamics GP, call Conexus SG today: 469-828-3274. Or drop us a line — we’ll be happy to be of help.